Since we store important images, documents, videos, app settings, etc., on our computer, it becomes mandatory to have a proper backup plan. So, in this article, we are going to share the best method to create a full system backup on Windows 10. [alert-announce]Also Read: How To Create A Windows 10 Recovery Drive/Disk[/alert-announce]
Create a Full System Backup of your Windows 10 PC
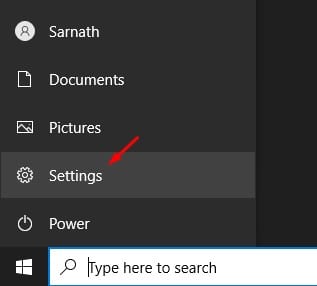
The good thing about this tutorial is that we won’t use any third-party app. We will rely on a built-in tool of Windows 10 operating system to create a full system back. So, let’s check out. Step 1. First of all, open the Start menu and click on the ‘Settings’
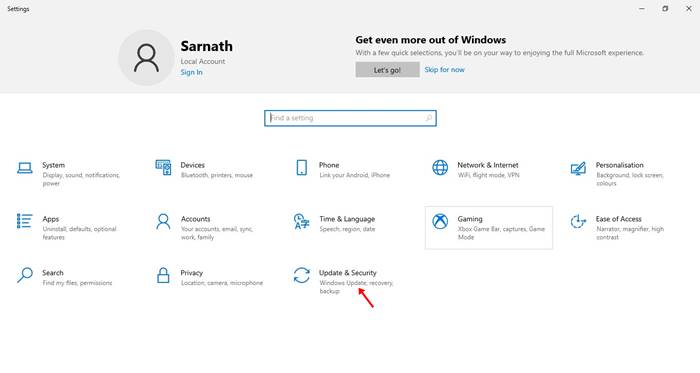
Step 2. On the Settings page, click on the ‘Update & Security’ option.
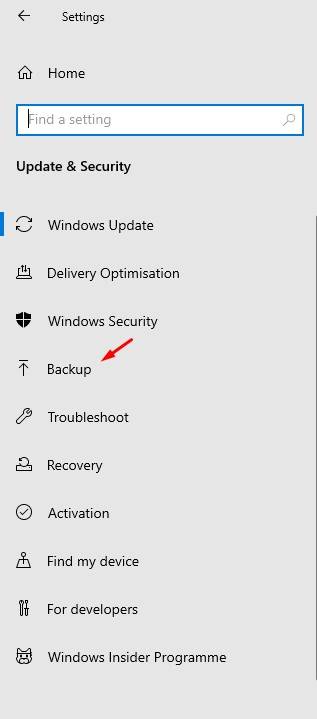
Step 3. From the left-hand side menu, click on ‘Backup’
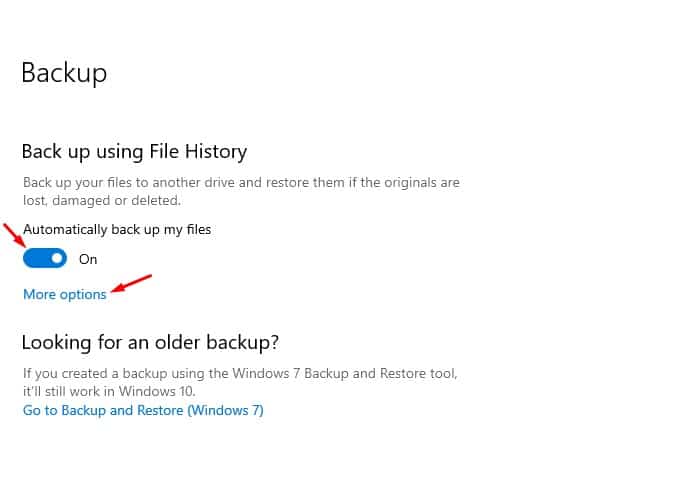
Step 4. Now enable the option ‘Automatically back up my files’ and click on ‘More options’
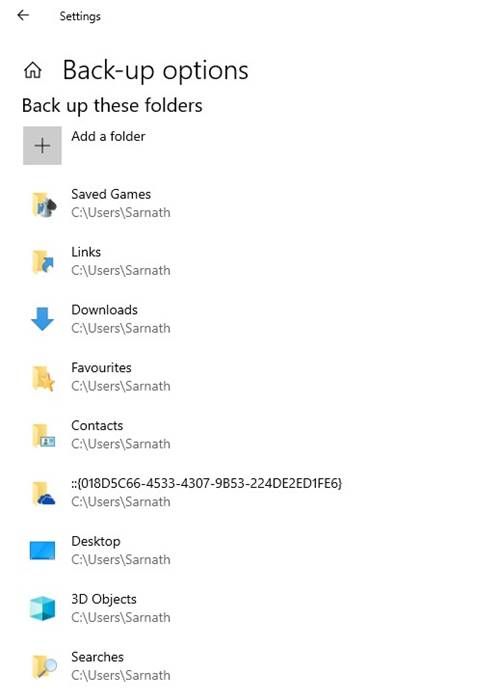
Step 5. Now under the ‘Back up these folders’, select or remove the folder of your choice.
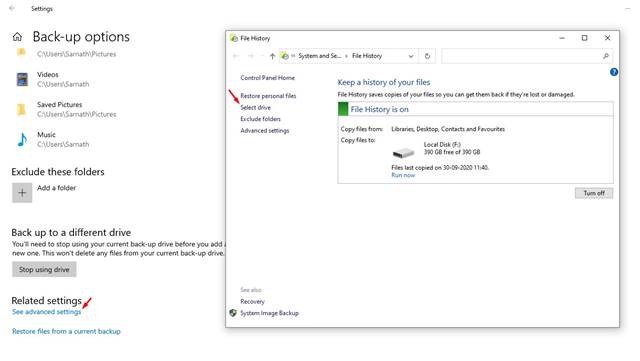
Step 6. To change a different drive, click on ‘See advanced settings’ and then on ‘Select drive’
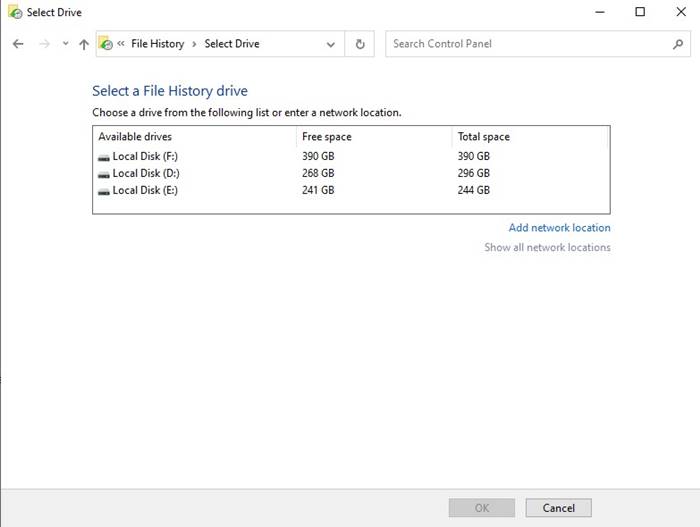
Step 7. Under the select a file history drive, select a drive where you want to save the backup.
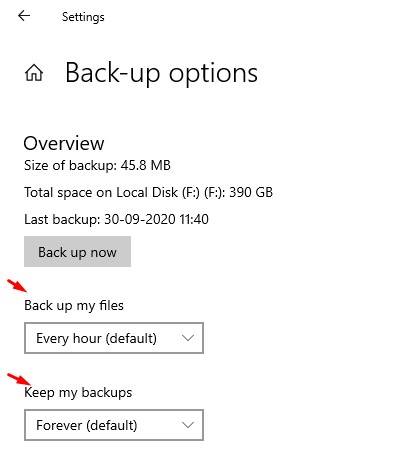
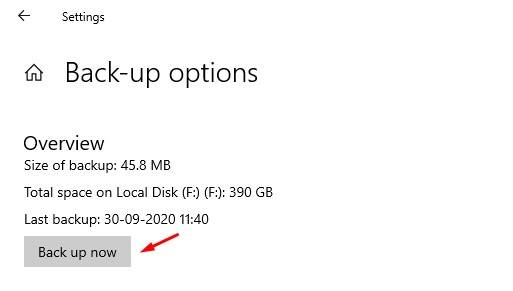
Step 8. Once done, go back to the backup options and select the backup time. Also, specify the time to keep your backups. Step 9. If you want to backup your system now, click on the ‘Back up now’ button.
That’s it! You are done. This is how you can create a full backup of your Windows 10 system.
How To Restore the data?
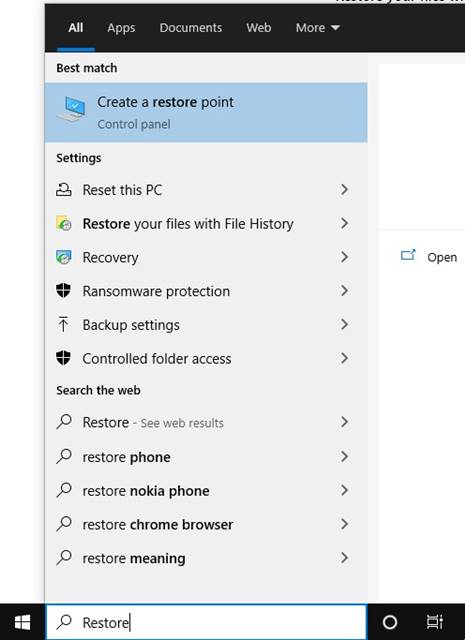
Well, if you want to restore the backup file for any reason, then you need to open the search box and type in ‘Restore files’.
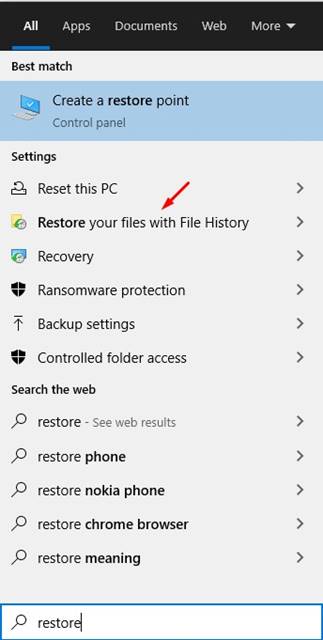
From the list of options, click on ‘Restore your files with file history’
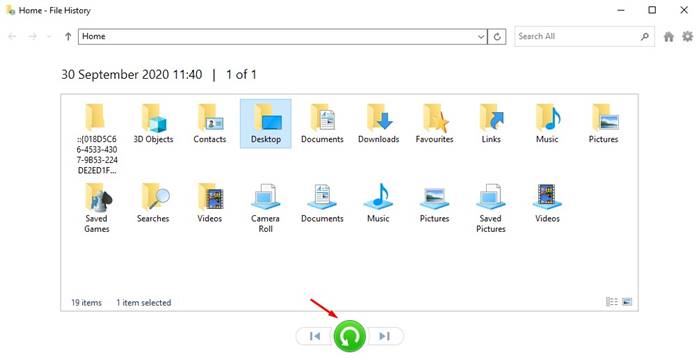
Now you will be able to see the backup files. Simply select the files that you want to restore and click on the ‘Restore’ button.
Conclusion
So, that’s all about how to create a full backup of your Windows 10 system. I hope this article helped you! Please share it with your friends also. If you have any doubts related to this, let us know in the comment box below.
Δ

